Recently a new DNS hijacker targeting macOS was discovered, being the first sneaky malware of 2018. Similar to the DNSChange trojan that affected over millions of computers in 2011, the new version of malware dubbed OSX/MaMi could change the DNS server settings on infected computers, and also hijack encrypted communication by installing a new root certificate.

The new OSX/MaMi malware was firstly reported on the MalwareBits’ forum. Then the former NSA researcher Patrick Wardle explored how this trojan works in his blog post. According to his analysis, by installing a new root certificate and hijacking the DNS servers, the attackers can perform a variety of nefarious actions such as stealing credentials or injecting ads. The DNS hijacker has a host of other abilities including taking screenshots, generating simulated mouse events, downloading & uploading files, executing commands, persisting as a launch item and more, he added. Current antivirus software don’t include detection for the OSX/MaMi malware.
By far it is still unclear who are behind the potential attack or how this OSX/MaMi malware infects target computers, but it is likely to spread around by malicious email, web-based fake security alerts/popups, or social-engineering type attacks to target mac users.
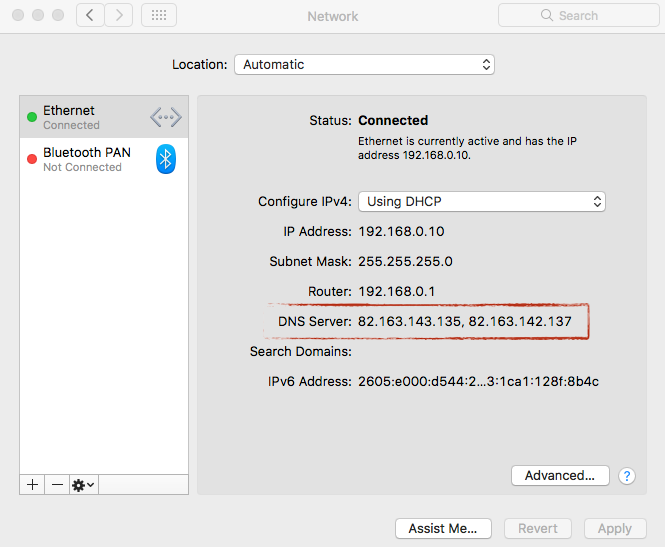
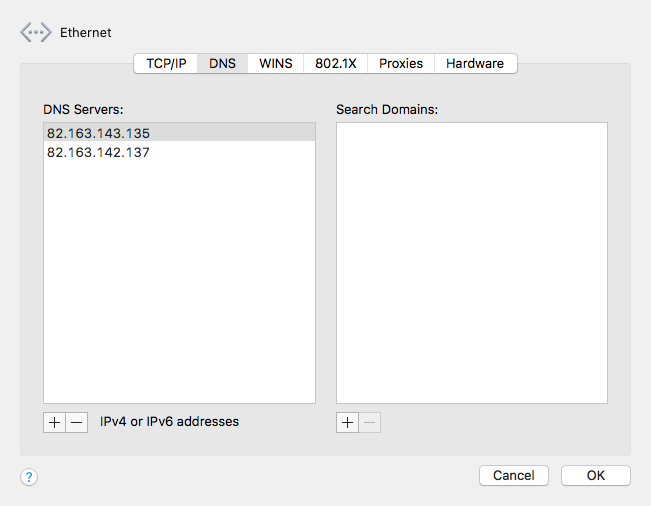
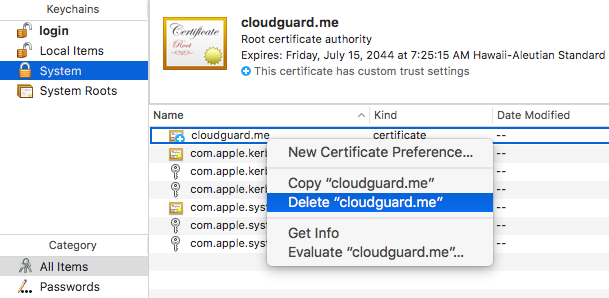
To check if your Mac has been infected by the OSX/MaMi malware, go to verify if your DNS settings have been set to 82.163.143.135 and 82.163.142.137. To do so, launch System Preferences from the Apple menu, head into the Network menu, and select your active network device. Then click the Advanced button on the right pane, and click DNS tab to reveal the info. Besides, go to check if the malicious cloudguard.me certifcate appears in the System Keychain.

If unfortunately you were infected, the best way is to perform a fresh install of macOS, to get rid of OSX/MaMi hijacker and any other malware it may have installed. Yet if you are reluctant to do so, you can simply reset the DNS servers and delete the malicious certificate as well.
To remove DNS servers, select the changed server(s) in the list of DNS Servers under the DNS tab, and click the minus (-) button to delete them one by one.

To remove certificate, open the Keychain Access app, click the System tab on the left pane, and locate the item labeled cloudguard.me in the right pane. Then right click on it and choose Delete cloudguard.me option.
