If you are planing to sell or give away your Mac to others, you are better to follow the advice Apple gives: erasing the hard drive after creating a backup of your Mac. For those who own the MacBook Pro with Touch Bar, there is one more thing to do: erasing the information that is stored in Touch Bar. This post will show you how to do it right.
To reformat the hard drive and reinstall macOS system, you can follow the steps below:
- Make sure that your Mac is connected to Wi-Fi and plugged in.
- Turn off your Mac, then hold the Shift – Command – R, press the Power button to turn on your Mac, and release the Shift – Command – R after entering into the Recovery Mode.
- Choose the preferred language, click Disk Utility, select Macintosh HD, and hit Erase.
- Hit Erase again in the confirmation dialog, and click Done when the process is finished.
- Back to macOS Utilities window, click Reinstall macOS, and click Continue button.
- Follow the onscreen prompts to complete the re-installation of macOS.
As the installation completes, Mac restarts and then Setup Assistant appears. If you are going to hand down your Mac to others, leave it unchanged and just shut down the Mac.
Besides, Apple provides a Terminal command to help clear all data in the Touch Bar.
- Hold the Command – R instantly after you press the Power button to turn on your Mac.
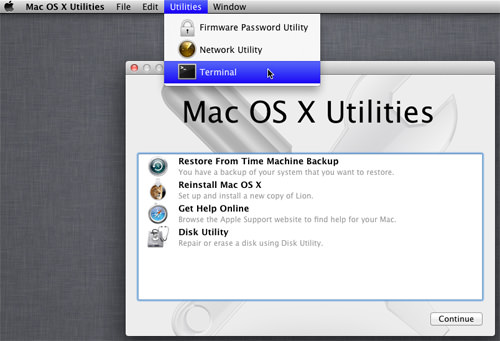
- In the macOS Utilities window, choose Utilities > Terminal in the menu bar.
- Type the command in the Terminal and hit Return key: xartutil –erase-all
- Type Yest when asked whether to erase all entries, and then hit Return button again.
- Choose Terminal and then Quit Terminal from the menu bar.
So that’s how to erase the data stored in Touch Bar using a Terminal command. Apple does not reveal the types of data Touch Bar stores and what will be erased by this command.
Before erasing your Mac as well as Touch Bar, you are also advised to sine out of iTunes, iCloud and iMessage, and to unpair your paired Bluetooth device if have any.