Permission settings allow specific users to view or modify files on the computer. You can set a file or folder to be read-only so that other users who log in to your Mac cannot change or delete it. You can also restrict the permissions for certain users and groups to prevent the file from being edited or even accessed. But how to change the settings?
This post will show you how to set file permissions for particular users on Mac.
First of all, do the following steps to assign permissions to users and groups:
- Open the Finder and navigate to the specific disk, folder or file.
- Right click on the item and choose Get Info from the contextual menu.
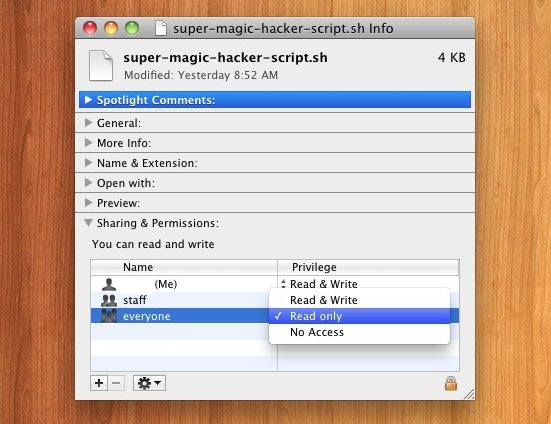
- In the file info window, click on the triangle icon beside the Sharing & Permissions to disclosure the read and write privileges information if it is not visible.
- Click on the Lock icon if necessary, and type an administrator password if prompted.
Now you can click a user or group in the Name column, and then choose a privilege setting from the pop-up menu. The available options include Read & Write, Read Only, Write Only and No Access. Read-Only allows the user/group to open the item while cannot change the contents or delete it. Users cannot open a Write-Only file but can copy it. Choosing No Access will block the user or group from accessing to the selected item.
To add or remove a user or group in the Name column, follow the steps below:
- Select an item in the Finder, and choose File > Get Info from the Menu bar.
- In the Sharing Permission section, click on the Add button (+), select a user or group from the pop-up menu, and click on Select button to add a user or group.
- To remove a user or group, just select the name, and click on the Remove button.
To apply permissions to all items in a folder or a disk, you need to select the folder or disk, choose File > Get Info, then click on the Action button next to the (+ -) under the Name column to display the drop-down menu, and choose ‘Apply to enclosed items’.
To change the owner of an item, select the new owner from the Name column in the Info window, click on the Action button below, and choose ‘Make [user name] the owner’.
After all the modifications are done, don’t forget to click on the Lock button again to prevent privilege settings from being changed by others. Have you learned the tricks yet?